
Pumpkin Life Cycle Activities for Montessori Science Learnin
Hi friends — welcome back! Autumn brings a wonderful scientific learning opportunity: the lifecycle of a pumpkin. Using this theme, we can support children’s natural curiosity, their scientific sensibility and the link between hand-work and mind-work. As Dr. Maria Montessori stated, “The hand is the instrument of intelligence.”
In this article I’ll guide you through how to set up pumpkin-lifecycle activities in a Montessori way, including how to use our Adena Montessori materials and the prepared environment to support meaningful science learning for the 0-6 age range.
Why the pumpkin lifecycle is an ideal theme
l It is concrete, visible, and seasonal — children can actually observe real pumpkins, vines, seeds, leaves, flowers and so on.
l It encourages classification, sequencing, fine-motor engagement, and sensory exploration (touching seeds, feeling vine textures, examining pumpkin surfaces).·
l It integrates “sensorial” and “biology” work seamlessly: colour, shape, texture, size, growth, change over time — central Montessori concepts of “control of error”, “self-correcting materials” and “prepared environment”.
·
Setting up your exploration
1. Gather materials: a small pumpkin, seeds, vine piece if available, a carving tool (adult supervised), a sequence-picture set of pumpkin life stages (seed → sprout → flower → green pumpkin → orange pumpkin → harvest). You can use an Adena Montessori tray set to organise these pieces.
2. Introduce the sequence: Lay out the pictures and ask the child to order them (this supports sequencing, logic and independence).
3. Sensory work: Invite the child to open a pumpkin (or half it) and observe seeds, flesh, rind, smell, texture. Use hand lenses if available.
4. Matching work: Have real seeds beside pictured seeds; small-medium-large pumpkins; green vs orange; inviting “same/different” thinking. This echoes Montessori’s sensorial sequence.
5. Growth tracking: If you want, plant a few pumpkin seeds indoors (or outdoors if climate allows), label them with dates, and observe: germination, leaf growth, vine growth, flower, fruit. This gives long-term observation and supports patience and concentration.
6. Language enrichment: Use vocabulary like “germination”, “vine”, “female flower”, “male flower”, “pollination”, “harvest”. In Montessori vernacular, you’re offering “cosmic education” for young children — the idea that the child becomes aware of the interrelationship of living things in the world.
7. Reflection & work of the hand: After observation, the child might draw the stages, or use our Adena Montessori natural-wood life-cycle puzzle/sequence cards, or perhaps thread pumpkin-seed necklaces (for older children) — building fine-motor skills, concentration and independence.
Tips for success
l ·Keep the setup simple: one tray, one sequence, one sensory bin. Too many items = distraction.
l Offer the activity when the child is calm and ready; the prepared environment matters.
l Let the child lead: if they want to revisit seeds multiple times, let them. Don’t rush to “finish”. As Montessori reminds us: “Education is not something which the teacher does, but a natural process that develops spontaneously in the human being.”
l Incorporate nature: take the child outside to observe pumpkin vines (if available) or visit a patch. Real-world connection reinforces abstraction.
FAQ
Q1: My child is very young (2-3 yrs) — will this be too advanced?
A: Not at all. For younger children, you can simplify: seed vs no-seed; small pumpkin vs big; feeling soft inside vs hard outside. Use the same trays and vocabulary, but fewer complexity layers. Self-correction and repetition are key.
Q2: What if I don’t have access to a pumpkin vine or a farm?
A: Use photos, sequence cards and perhaps a small potted plant or a squash from the grocery store. The concrete connection matters more than the perfect setting. You can still observe seeds and parts.
Q3: How long should one session last?
A: In a Montessori environment, the child might work for 20-30 minutes or more if they are engaged. For home, start with 10-15 minutes, and let the child revisit the tray across days. The key is repetition and refinement, supporting concentration and independence.
Q4: How do I use this in the home environment without making a “school-feel”?
A: Present it as a natural curiosity-invitation: “Let’s explore what happens to pumpkin seeds.” Sit with child, give them space, avoid heavy instruction. Use simple questions like, “What do you notice? What changed?” Let the child guide.
 Back-to-School Anxiety: Montessori Tips for a Smooth Transition
 Back-to-School Checklist: Montessori Study Corner Setup | Adena Montessori
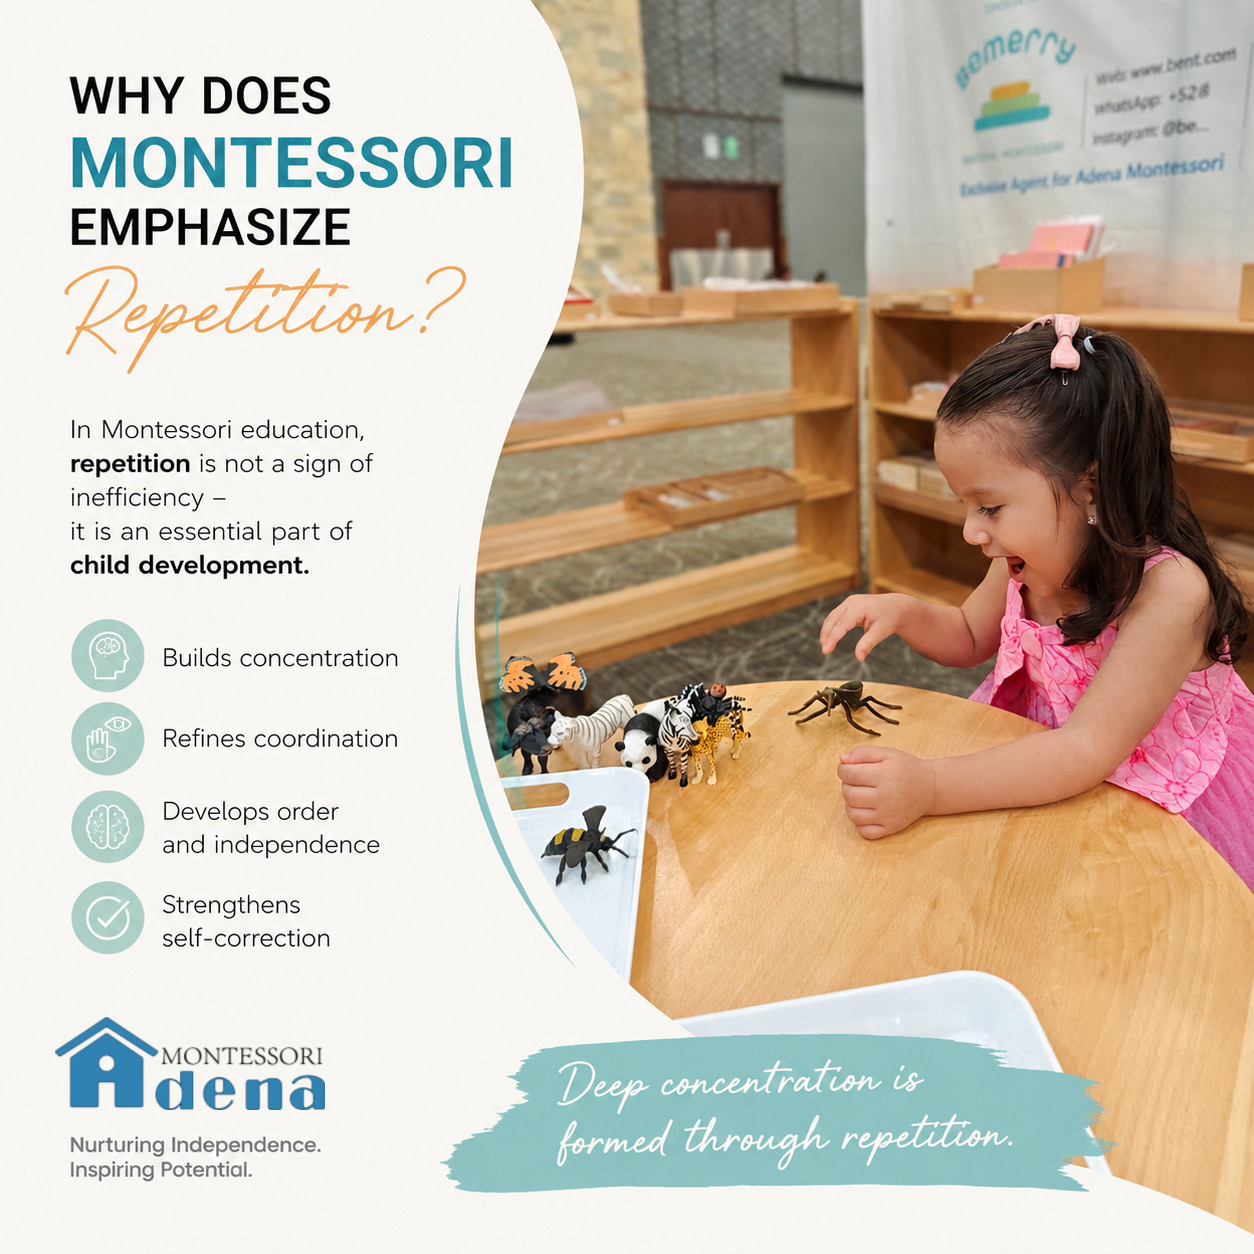 Why Does Montessori Emphasize Repetition?
 How to Build a Montessori Christmas Shelf at Home: A Simple Guide for Parents